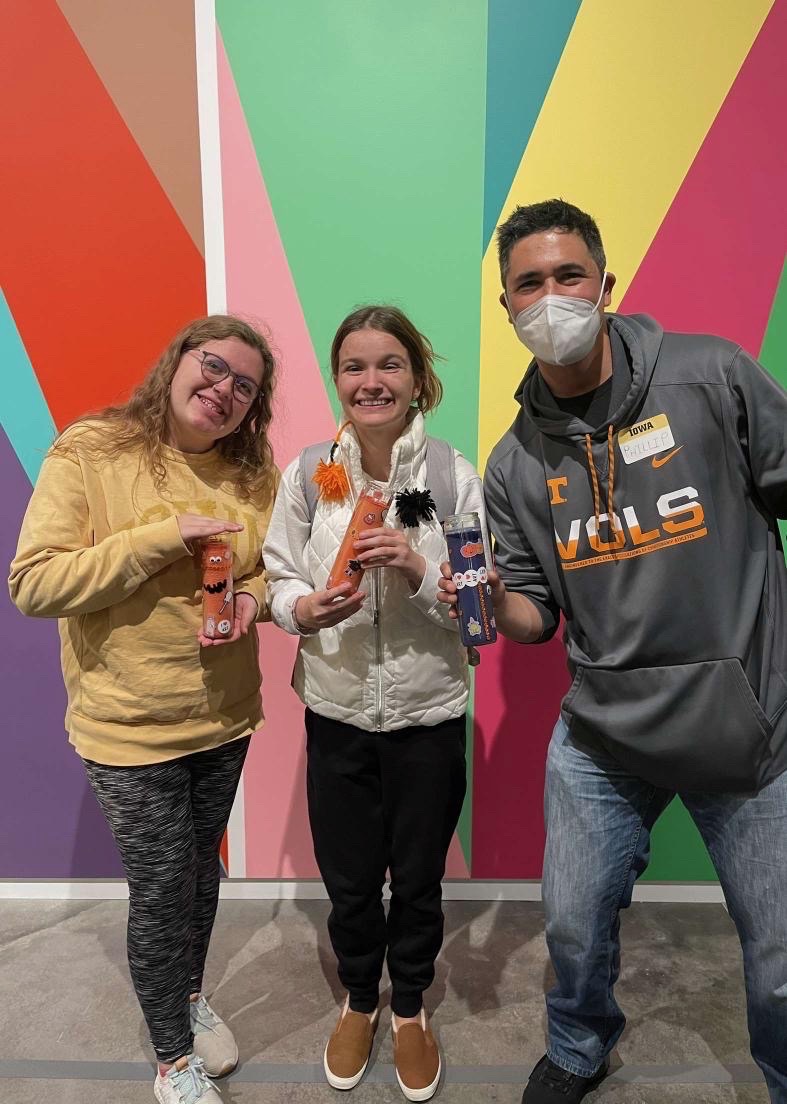
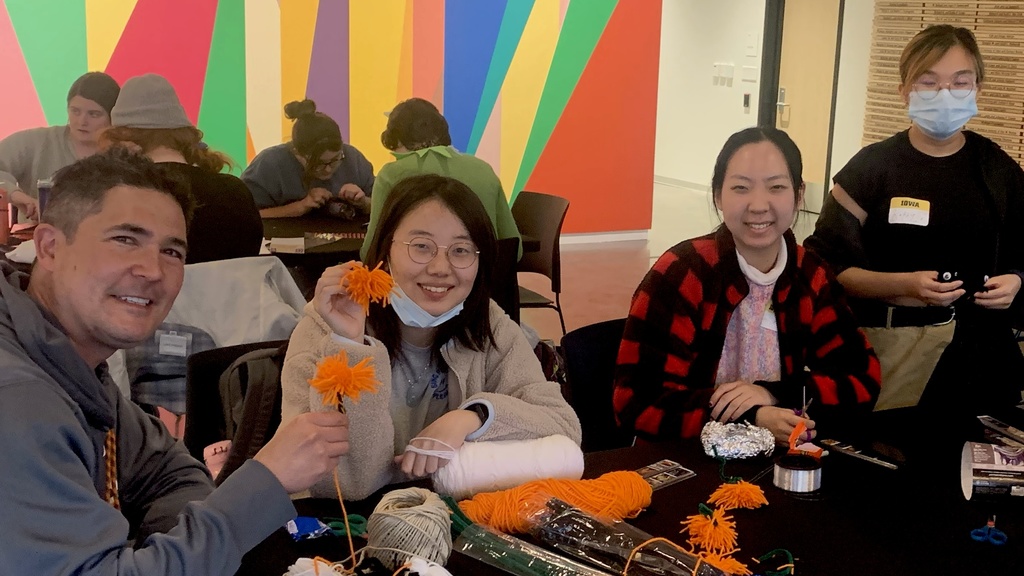
As part of our October Monthly Meetup event, the SCC laid out a few craft opportunities for students to do to help decorate their dorms and apartments for Halloween. If you want to hear more about the Halloween event, visit this link to our recap blog post.
If you want to learn how to make these crafts at home, read onwards! These crafts are both relatively easy, although the pompom craft is much more time consuming and messier. Be sure to have a vacuum cleaner or broom on hand for tiny yarn scraps!
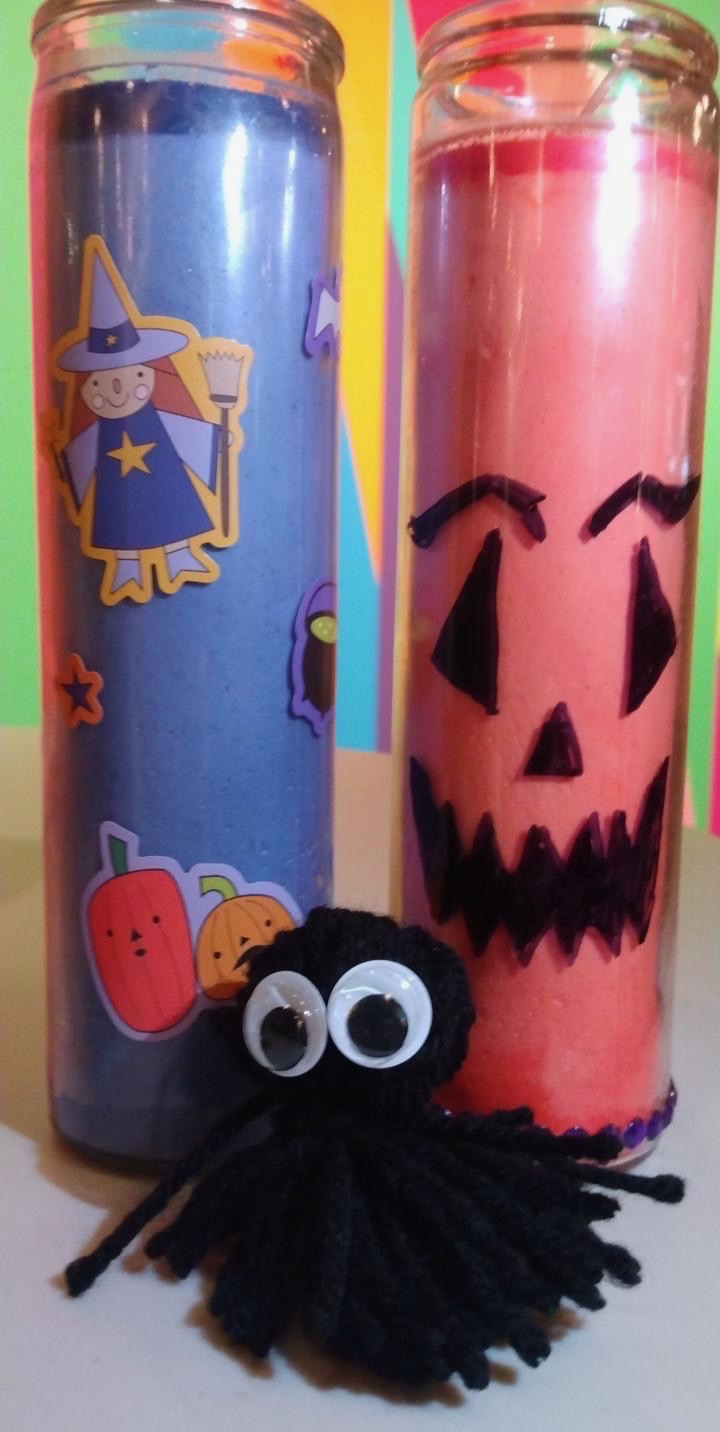
Just a little disclaimer--if you live in the dorms or in an apartment where your lease prohibits you from having candles, swap out the candles in the candle craft with LED candles or a different material!
Halloween Yarn Pom-Poms
These pom-poms are relatively cheap and easy to make and they're so cute! You can string up a few of them to make them into a decorative garland for your wall, mantelpiece, or door, or you can leave each one by themselves and rest them on top of your table to make a centerpiece, or put them on your desk, bookshelf, or side table for an additional pop of Halloween spirit in your space.
If you want to make this craft as easy as possible, I'd recommend sticking to the ghost pompoms only, and just doing them in different colors. You could easily make this craft not for Halloween by switching up the colors--you could use black and gold yarn for a Hawkeye-themed pompom garland, or any colors you'd like.
Materials:
For this craft, you will need:
- Yarn (we used orange, black, and white, but you can really use any colors!)
- Scissors
- Pipe cleaners/ chenille stems - black and green
- Optional: fishing line and/or twine, and googly eyes
Instructions
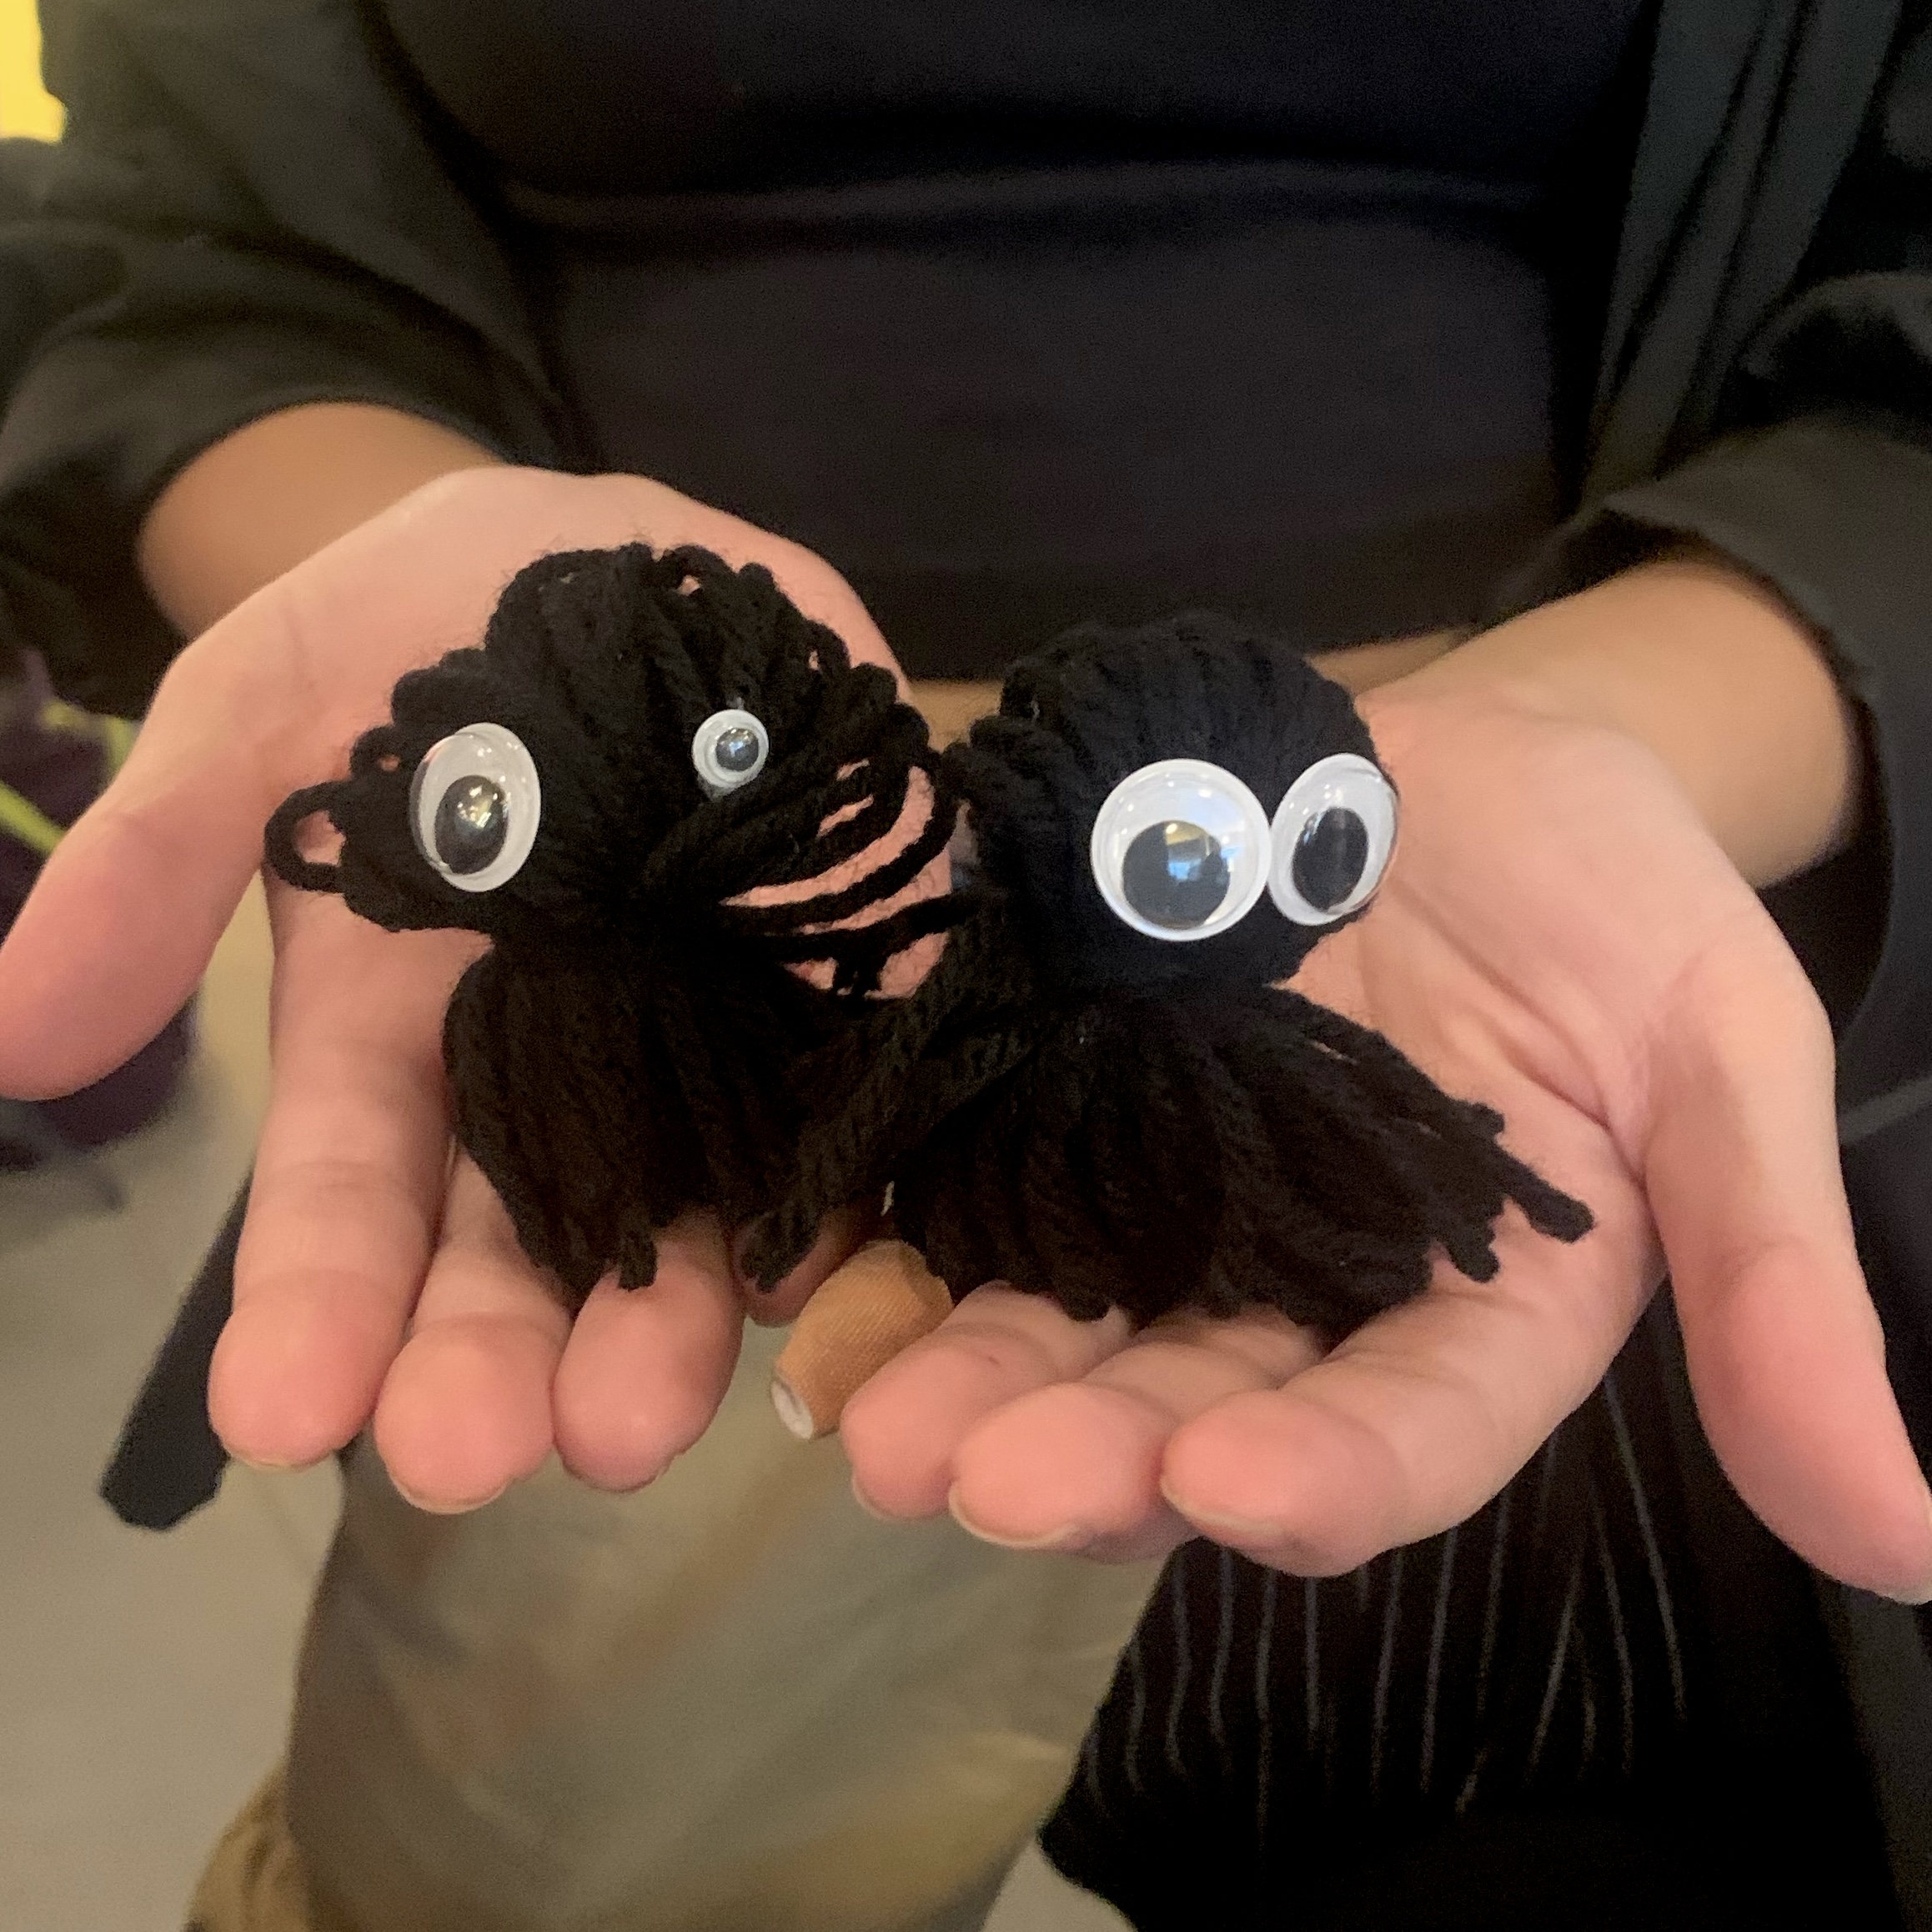
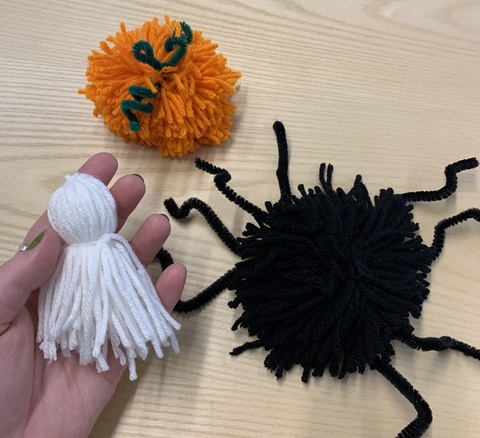
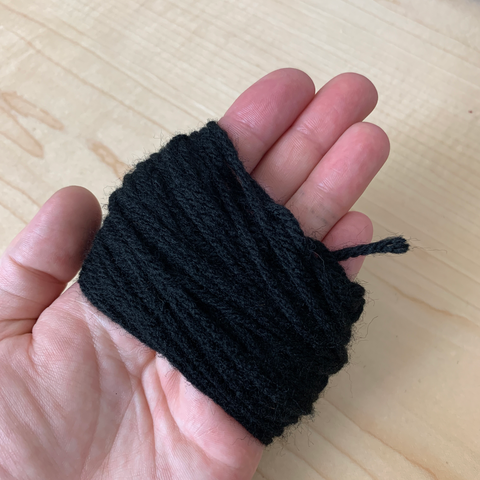
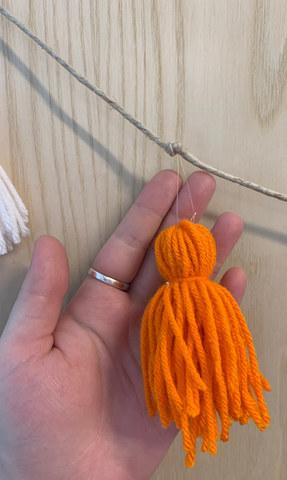
Each of the yarn colors corresponds to a differently themed pompom creature, although all of them feature the same basic steps. You'll want to begin building your pompom by wrapping your yarn around your hand (or, if you don't want to use your hand, you can use a piece of cardboard that is roughly the same size). For the ghost, you'll want to wrap the yarn around about 50 times; for the ghost and spider, you'll want to wrap around closer to 75 or 100 times. The more you wrap, the puffier your pompom will be. Don't wrap too tightly--you don't want to cut off circulation to your hand, and you also want to be able to slide the bundle of yarn off of your hand easily once you're done wrapping.
Once you're done wrapping, cut the yarn off of the skein. Remove the wrapped yarn from your hand or from the cardboard, careful to keep the wrapped shape intact. Depending on what shape you are making, here is where the steps really begin to differ.
For the Ghost
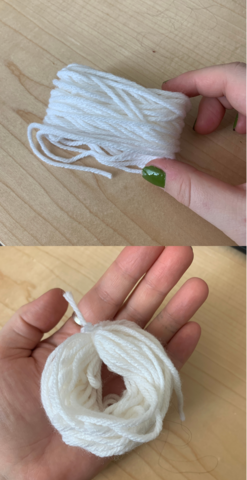
For the ghost/ a traditional pompom shape, you will want to take another piece of yarn, and loop it through the large wrapped pile of yarn you have. Pull this piece of yarn tight, and double knot it to secure; it'll sort of look like a big ring, or donut. This knot will be the top of your ghost's head.
Then, you'll want to get a second piece of yarn. You can tie this anywhere on the yarn pile, depending on how you want the ratio of head-to-body to be. I like to tie it closer to the head, so the ghost has a nice long tail. Instead of tying this string through the yarn, you will wrap it all the way around. Again, pull this piece of yarn as tight as you can, and double knot it.
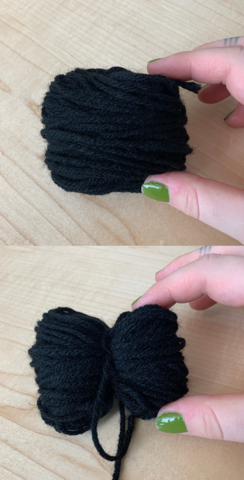
Then, you'll just cut all the loops at the bottom of your ghost! If you were very neat while wrapping your hand at the beginning, it should be easy to snip all the loops because they should be lined up well. But it's no big deal if you weren't super neat--just trim all the strings so they're roughly the same size. And there you have it! A pompom ghost. Feel free to embellish with googly eyes if you'd like, or just leave it plain.
For the spider and pumpkin
After wrapping the yarn around your hand (remember, you'll want to do closer to 75 or 100 wraps, so that the pompom turns out round and fluffy), you'll want to remove the entire thing.
You'll then want to tie another piece of yarn around the middle of the loop--this piece won't go through any of the yarn, merely wrap around the entire outside. Be sure to pull tight and double knot; once you're done with this step, it should look almost bow-shaped.
After this, you're going to do what you did for the bottom of the ghost--cut all the loops on both sides! You might have to even them out and fluff it up a bit, but you should end up with a round pompom.
Now, it's time to decorate. This is where the pipe cleaners come in.
For the spider, depending on the size of your pompom, use black pipe cleaners to serve as legs; you will either want to use two pipe cleaners cut in half for a small pompom (each half will be two legs) or four full pipe cleaners for a big pompom (each pipe cleaner will be two legs). You'll want to align your pipe cleaners together, and then feed them through that single piece of yarn you used to hold your pompom together at the center. Once they're in and centered, bend and shape the pipe cleaners as desired to make the spider legs!
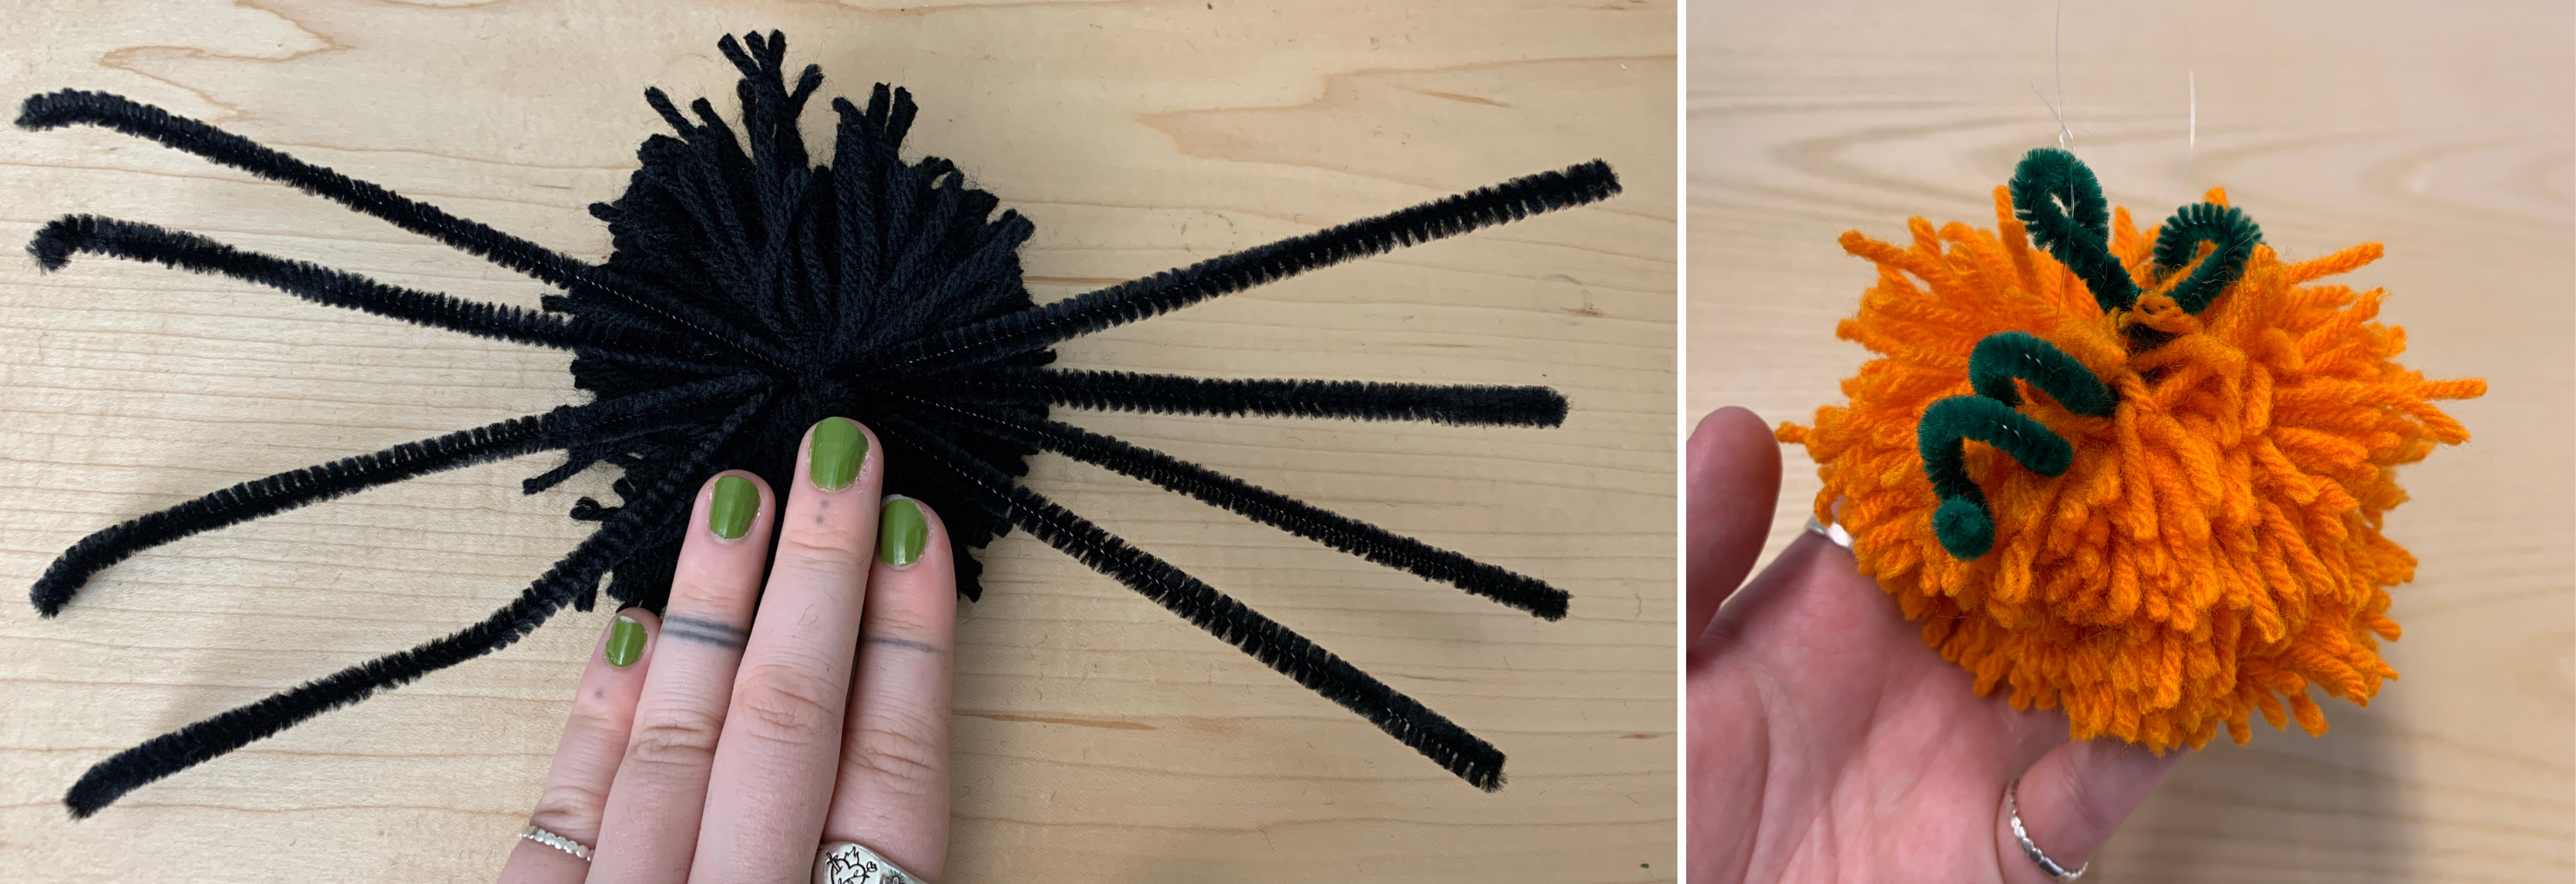
For a pumpkin, cut about half of a green pipe cleaner to serve as a stem. You'll want to run the pipe cleaner through the center string piece you tied to hold your pom-pom together, like you did with the spider legs. Curl and direct the pipe cleaner as desired so that it looks like a pumpkin.
After this step, feel free to add googly eyes or other embellishments to your pumpkins and spiders if desired.
To make a garland
If you're interested in turning your pompom creatures into garlands, you'll want to acquire some clear fishing line. Cut some short segments, and, similar to how you looped the pipe cleaners through your central yarn piece, string the fishing line through as well. Make a loop and double knot it.
You can stop at this step if you'd like, and hang your decorations on plants or trees, wall hooks, from door handles, on lamps, etc. Or, you can add the clear fishing line loops to all of your pompoms and then string them together on twine.
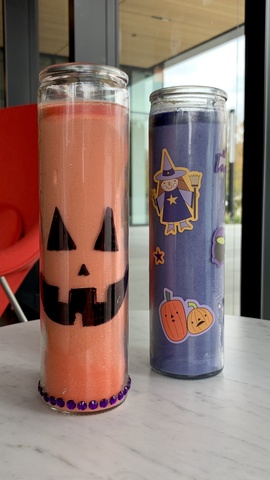
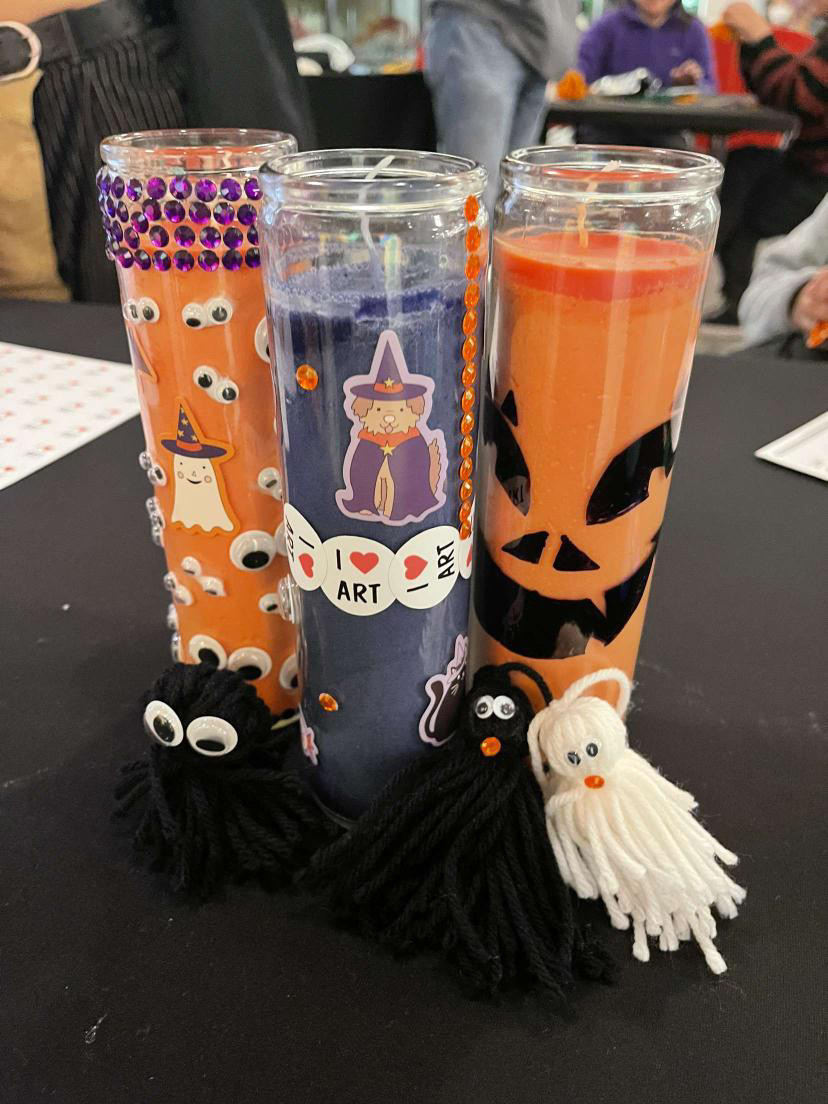
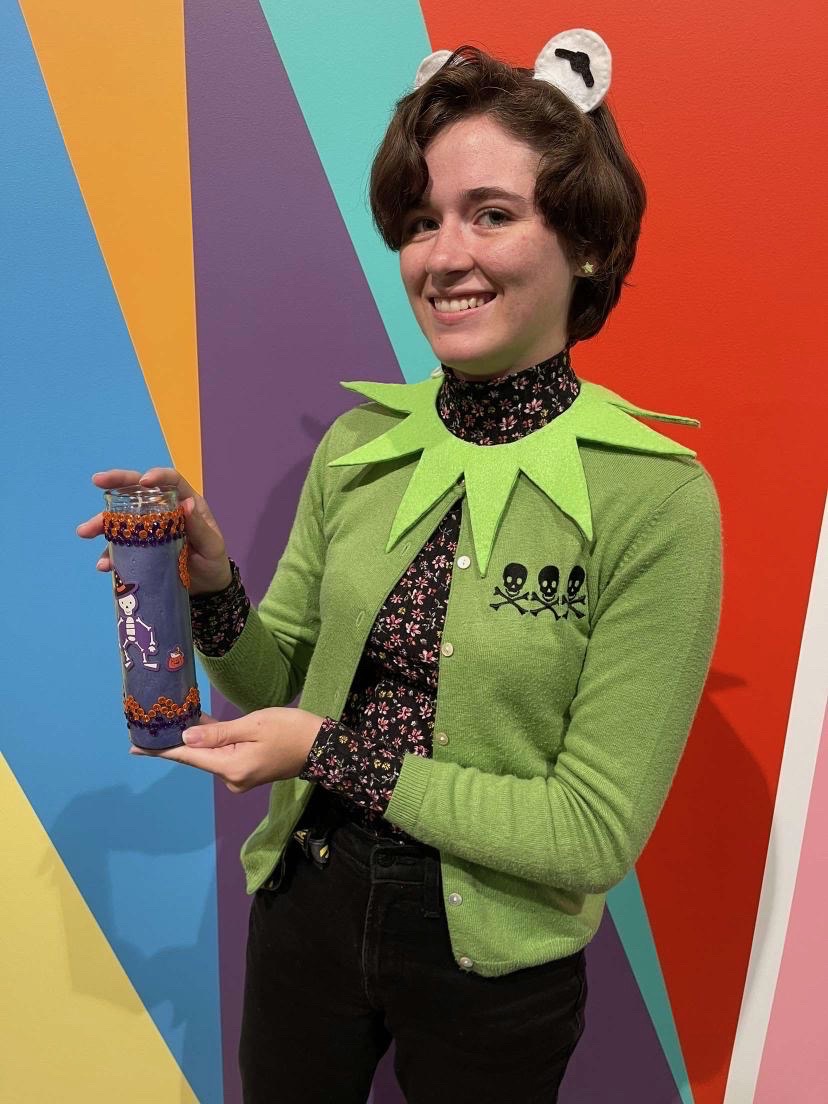
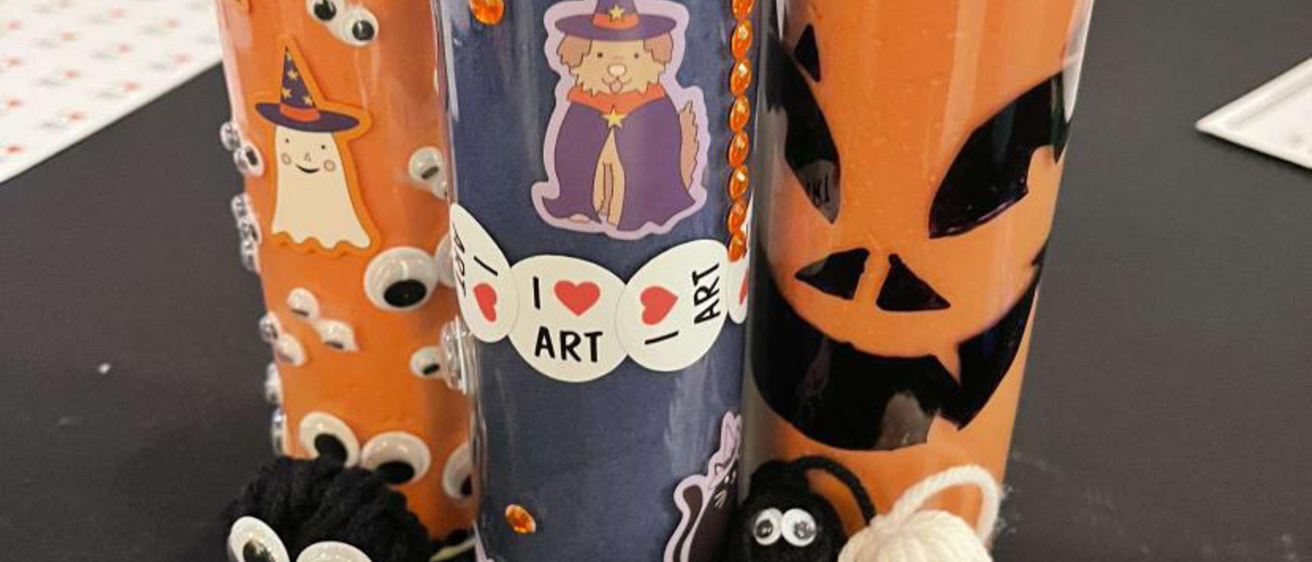
Halloween Candles
This craft is by far easier than the pompom craft. It's an ideal craft if you're doing it with your family or with young children, or if you prefer slightly more functional décor or like to change things up a little more.
And it's super easy to customize to fit your aesthetic! We used a fun kids' Halloween sticker book and a cheap packet of stick-on rhinestones from the dollar store--but the amount of fun craft supplies you could use to decorate your candles is endless!
If your candles come with a large sticker on them, like ours did, we recommend soaking them in warm water (not the whole candle--don't get the wax wet!) for about thirty minutes. After that amount of time, the sticker should peel right off. If you're unable to get it off neatly, we recommend using a razor blade to scrape it off.

Materials
Tall votive candles (I found cheap ones at the dollar store- available in white, orange, purple, and other colors)
Sharpie markers
Optional: additional embellishments- stickers, rhinestones, googly eyes, etc
Instructions
This craft is relatively straightforward. You can either draw on a decoration with your sharpie marker (think: jack-o-lantern faces for orange candles, ghost faces or designs for white candles, or spiderwebs for any candle!), or just stick on any stickers or glue on googly eyes, rhinestones, or other embellishments as desired.
Happy Halloween, everyone! If you end up making these crafts, tag us on Instagram @stanleycampuscouncil or send us an email with a photo so we can add it to this blog post!